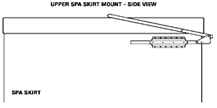
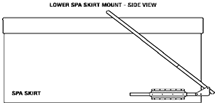
Step 1
The spa cover must be in the closed position prior to mounting the
UltraLift. Position the spa cover properly, ensuring it is sitting
squarely on the spa.
Step 2A - for Side Mounting Applications Only
Attach the mounting brackets to the side of the spa using the #10
x 1 screws included. To prevent splitting of the wood skirt, we
recommend pre-drilling the holes using a 1/16" drill bit.
Note: The height at which the mounting brackets
are attached will affect the amount of clearance required behind
the spa. If more clearance is required due to the presence of wall,
fence or similar structure behind the spa, the mounting brackets
should be attached lower on the spa.
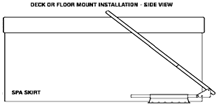 Step
2B - for Deck Mounting Applications Only Step
2B - for Deck Mounting Applications Only
For deck mounting applications, position the mounting brackets parallel
to the side of the spa 3" from the side of the spa skirt.
Note: The distance between the mounting brackets
and the end of the spa shell will affect the amount of clearance
required behind the spa. If more clearance
is required due to the presence of a wall, fence or similar structure
behind the spa, the mounting brackets should be attached further
from the end of the spa.
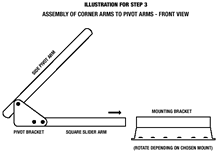 Step
3 Step
3
Connect the square slider arm to the side pivot arm using the pivot
brackets and the 3/8" x 16" x 2" hex bolts. Slide
the square slider arm into the mounting bracket on each side of
the spa.
Step 4
Insert the long end of the corner support arms into the center pole.
After positioning the center pole so that an equal space is on each
side of the spa, slide the short end of the corner arms into the
pivot arms.
Step 5
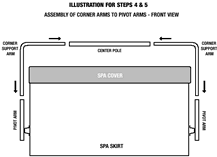 Allow the UltraLift to rest on the spa cover. Make sure the center
pole is in the middle of the spa cover and adjust the corner support
arms so that the center pole is situated parallel to the spa cover
allowing between 1/2" and 1" of space from the center.
Attach the center pole to the corner support arms using the #10
x 5/8" self-tapping screws. We recommend rotating the
center pole so that the screws are inserted horizontally.
Step 6
Position the slider arm so that an equal amount of space is on each
end of the mounting bracket. We recommend you attach the slider
arm to the mounting bracket by inserting one #10 x 5/8" screws.
Insert the two plastic caps into the open end of the side pivot
arms. That's it - you're finished!
Note: Clevis pins are to be inserted into the pivot
brackets when the spa cover is in the open position for added safety
and removed when the cover is to be closed.

|